How To Change Opacity in Procreate
An essential tool for many digital artists is altering the opacity of brushes or other tools. This can help achieve specific effects or keep brush strokes light to build on them quickly. If you’re using the iPad art program Procreate, you’ll definitely want to know how to change opacity levels so you can get the most out of the app.
There are actually multiple ways you can change opacity in Procreate, depending on how you try to use it. In this article, we’ll explain how opacity works in the program, as well as the different ways you can change and use it.
How To Change Opacity for Tools
When you start up Procreate and open a project, you’ll see a few different toolbars with some features. For changing opacity in Procreate, you’ll most want to pay attention to the sidebar on the left of the screen. Also, select the tool you want to use, as you can separately set opacity levels for the brush tool, smudge tool, or eraser.
Here’s how to change opacity using the slider.
- On the left-hand sidebar, use the bottom-most slider.
- Tap and hold on the slider. Drag it downwards to decrease opacity levels or upward to increase them.
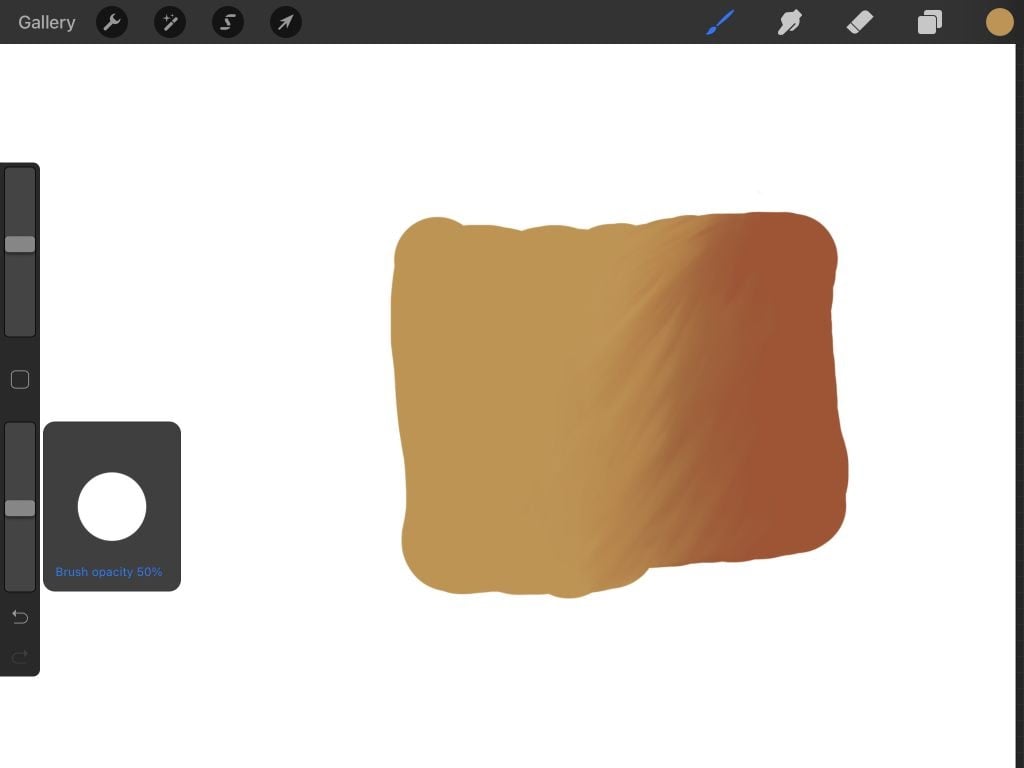
- Now, use the tool you have selected on the canvas screen to see how its opacity has changed. You can make adjustments as needed whenever you want by going back to the slider.
You can also change the opacity level for any brush in Procreate separately. There are a few different options in brush settings for altering opacity. Here, we’ll focus on a couple of the main options.
- Tap on the Brush tool, find the brush you want to use and tap on it.
- In the brush settings, go to Properties.

- Near the bottom, you’ll see options for Maximum Opacity and Minimum Opacity. First, you’ll need to change Minimum Opacity, the lowest opacity the brush can reach according to how much pressure you apply with your pencil.
- Now, you can change the Maximum Opacity, which is the maximum level of opacity the brush can reach overall. You can make both the minimum and maximum opacity levels the same if you don’t want the pressure to make a difference in this way.
In the brush settings, you can also go to the Apple Pencil setting to change opacity even more:
- Under Apple Pencil, go to Opacity under Pressure.
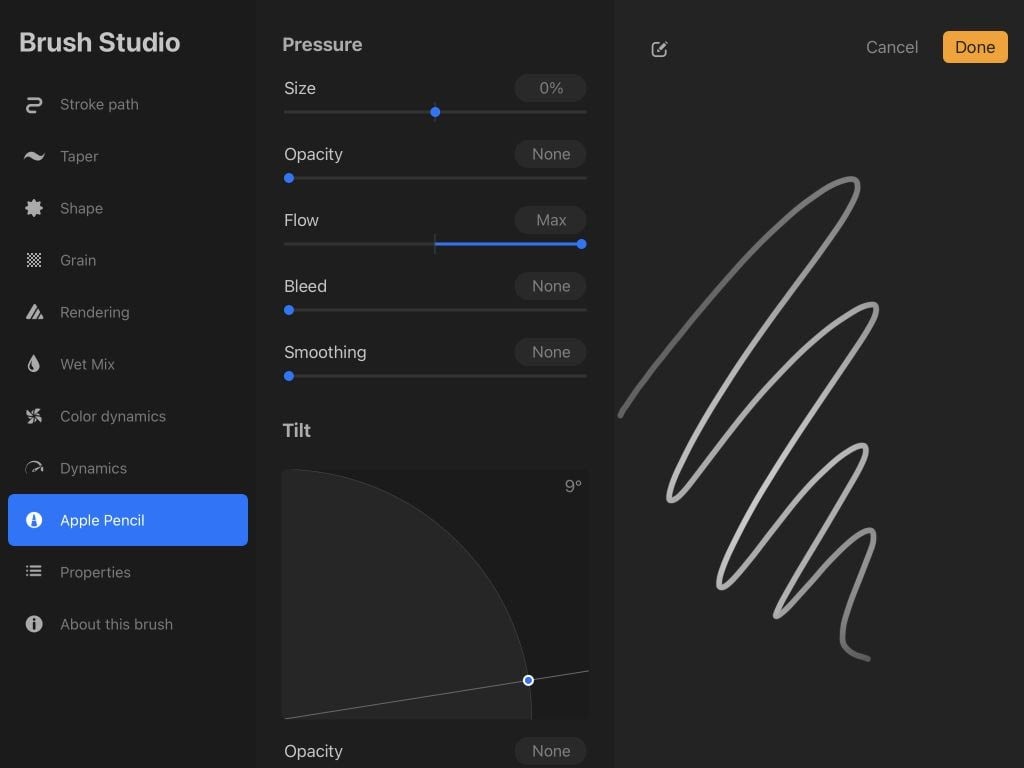
- Altering opacity here will change the opacity levels according to how much pressure is applied when using the brush.
As far as pressure goes, the middle of the brush stroke in the preview is where the most pressure is applied, and the ends show where less pressure is applied.
How To Change Opacity for Layers
There may be situations where you want to change the opacity of an entire layer. This can be a quick way to add an effect, or if you’re sketching, it can help you do line work over an initial sketch.
- Open the Layers menu in the top-right corner with the icon of two overlapping squares.
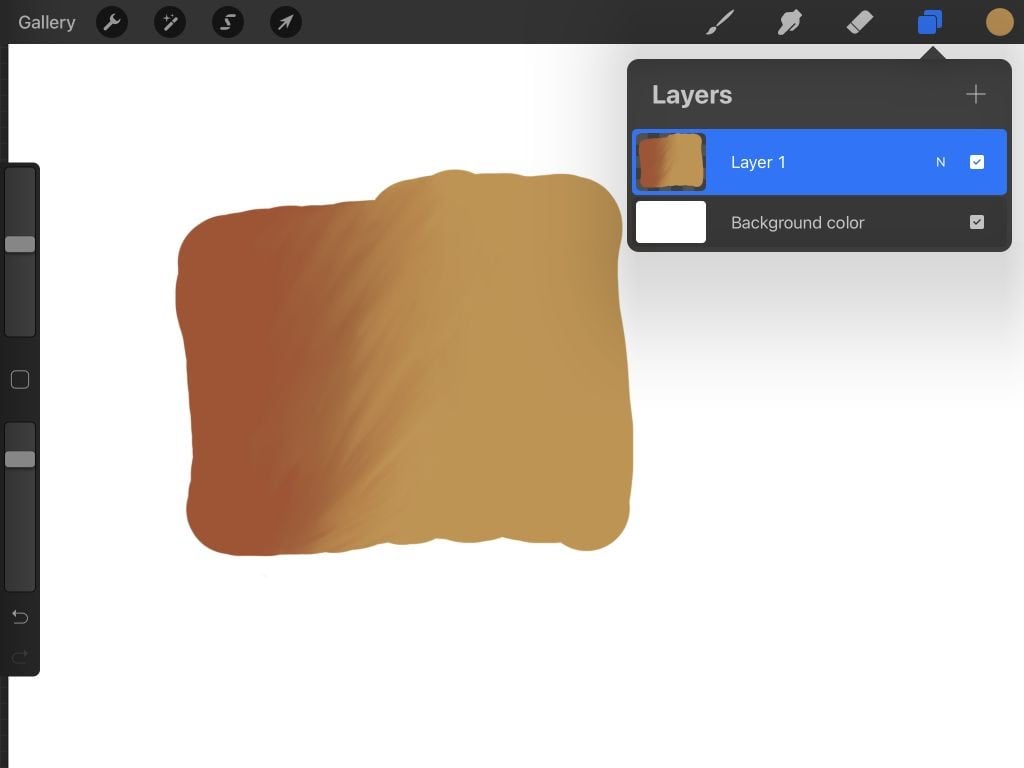
- Select the layer you want to change the opacity of and tap it with two fingers.
- The Layers menu will close, and you’ll see a blue bar at the top labeled Opacity. Slide a finger left or right to change the opacity levels of the layer.
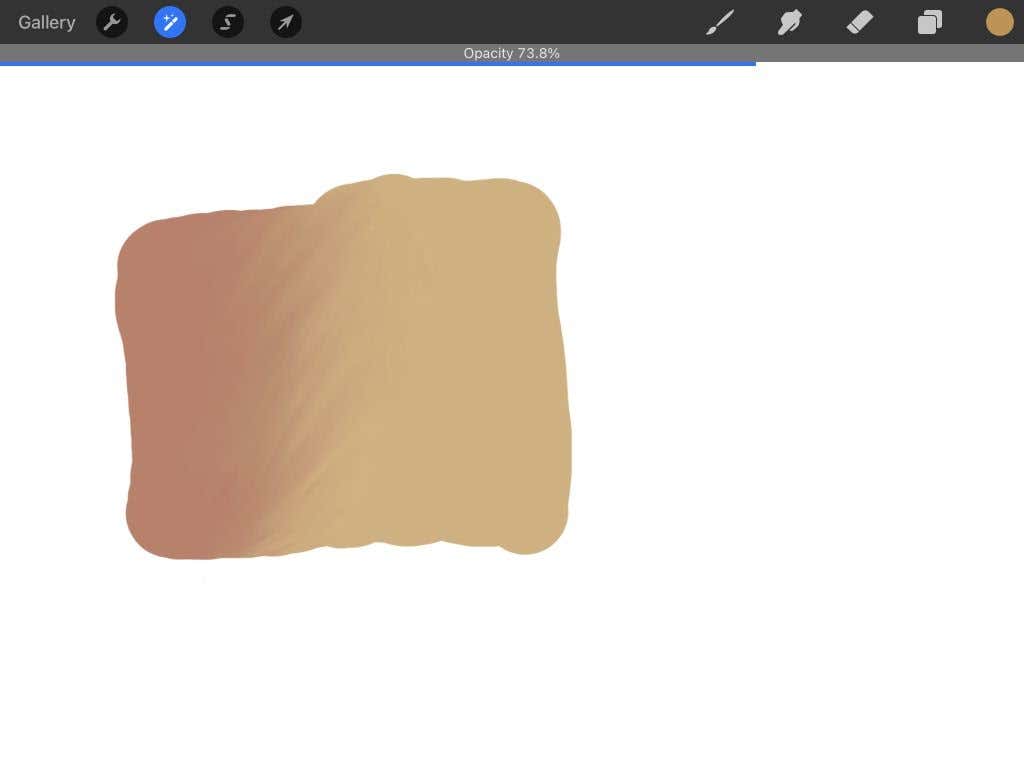
- Alternatively, you can tap on the N in your chosen layer in the menu, and the Opacity slider will appear.
Make sure you only have one layer selected before tapping, as you can’t change the opacity of more than one layer at a time.
Tips for Using Opacity
Like with other Procreate tools, there are endless possibilities for utilizing opacity in your projects. Whether you’re sketching, painting, or jotting down ideas, opacity can add another layer of depth.
Add More Realism
If you’re trying to add in special effects such as smoke, fog, or shadows, opacity can help you get a more realistic result. Try using low opacity brushes to draw or paint these effects, or draw them in a single layer and lower the layer’s opacity as you see fit.
Trace Over Lines or Photos
One of the most helpful opacity uses is line work and tracing. For example, if you use Procreate to illustrate, it’s easy to sketch out a drawing on one layer and lower the opacity so you can make cleaner lines over it on another layer.
Also, if you want to trace something specific, or you’re learning how to draw and want to practice on a reference picture, you can import a photo into Procreate on a layer and then lower that layer’s opacity so it’s easy to see your brush strokes over it.
Build Up Colors
Painting in Procreate can be improved by using opacity correctly. It allows you to use brushes lightly to build colors up into darker values when trying to portray light and shadow.
Blend Colors
Opacity can also help in blending colors. Simply lower the opacity of the brush you’re using with the color you want to blend with, and use it in light strokes to achieve this effect.
Changing Opacity in Procreate for Ultimate Creativity
You’ll find that using opacity becomes an indispensable tool in your artwork after you’ve mastered it. It’s useful for various reasons, and once you understand your way around it in Procreate, it’ll be easy to incorporate it into whatever art you’re working on.
Post a Comment